Whether it’s your first tank or your tenth tank there’s no getting around how expensive this hobby can be. We also don’t want to save money in the wrong places and get equipment that cannot handle what we need it to, especially when it comes to aquarium filtration. Without a proper filter we can expect cloudy tanks, debris in the water column and waste digging into the substrate.
Thankfully there are a handful op cheap aquarium filter options that can decimate water waste without emptying our wallets. Each of these filters has been tested in my own home aquariums for no less than 3 months each. Read on to find a detailed review of each aquarium filter and how they performed.
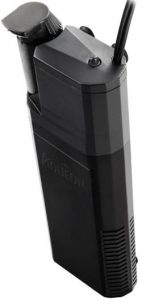
Aqueon Quiet Flow Internal Filter
| Cost: Low | Filtration: Medium
Size: 10-40 Gallons | Warranty: Lifetime |
The Aqueon Quiet Flow internal filter is the go to for new aquarists and experience alike. It is easy to set-up and maintain, remains quiet throughout its lifetime all while managing to provide strong filtration.
Setting up can be done in one step, however I suggest you go a bit further when setting up your filter. This filter attaches to the wall via suction cups on the back side and turns on when plugged in. Additionally you can control the flow rate and direction. The flow rate is controlled by a small slider underneath the outlet while the direction can be controlled by turning the outlet itself.
Changing the filter media is relatively quick. Simply detach the bottom of the filter from the motor and carry it to the sink. You’ll probably want something to catch the dripping water, as it takes quiet a long time to drip dry over the tank. The inside features a small blue cover that comes off, exposing the filter media cartridge. Simply remove this and replace it while rinsing off the filters grate. If you want to use your own filter media I’d suggest these poly pads found on amazon. They’re extremely cheap and absolutely huge.

That’s a quarter too, not a penny
How to run dead silent
It’s in the name, quiet flow, and can easily be run silently in a bedroom when set up properly. To do so simply
- Keep the filter as deep as possible. More water between the surface and the filter means more resistance for the sound.
- Position the filter on the back of the tank. While it may not vibrate much, it can be heard in a dead silent room. This makes the distance just a bit further.
- Turn down the water flow at night. This will combat any vibration based noise.
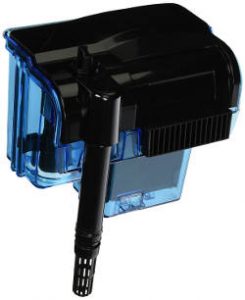
Penn Plax Cascade Hang-on Power Aquarium Filter
| Cost: Low | Filtration: Med/High
Size: 10-100 Gallons | Warranty: 3 Years |
This filter is next to impossible to beat when it comes to cheap and powerful filters. It can be a bit finicky with low water levels, but other than that I’ve had no issues with this guy.
As with all power filters, the Penn Plax Cascade power filter works by pulling water up the intake and channeling it through a series of filter medias. The model I have, 50 gal, has two slots for filter media, divided by a thin black grate. The tank it’s in is nothing fancy so I just run activated carbon every two weeks and the above mentioned Poly Pads from amazon. Honestly theres just so much padding from that order I have trouble using it all. Combined with its great performance and you’re basically throwing money out the window going with filter cartridges.
When the water has run through the filter media it returns to the tank from the front of the filter, creating a waterfall into the tank. Keep this in mind, as it can be too noisy for the bedroom. This can be remedied with a higher water level, however water will always evaporate, making the filter a bit noisier each day.
The design is solid and will easily outlive its three year warranty. I was unfortunate enough to get a damaged unit however, with the motor being quite a bit noisier than it should be. Amazon quickly replaced the filter and our 50 gal has been crystal clear ever since.
The filter media can be changed by lifting the top off, which simply sits there. No clamps, clips or screws. The flow can also be controlled by a knob located on the top of the filters intake. Unlike other filters this affects the flow rate significantly, as well as the noise level. Think vacuum cleaner vs fan.
If you have a tank of 100 gallons or less you should certainly give this filter a try. There is no filter that comes close to this strength without at least doubling the price.
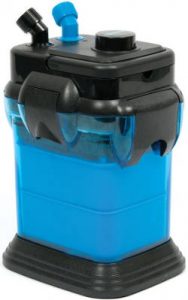
Penn Plax Cascade Canister Filter
| Cost: Med | Filtration: Excellent
Size: 30-180 Gallon | Warranty: 3 Years |
I know I know, this one is a bit higher but hear me out. Canister filters are the end game dream of aquarists when it comes to filters. The are powerful, quiet and extremely flexible when it comes to filter media. Additionally if you have a sump or refugium this can be used to replace the return pump, cutting costs further. If you don’t mind spending a bit more, I highly recommend this particular canister filter. It is powerful enough for my large bedroom aquarium without creating any noise what so ever.
Setup
Because this filter sits outside of the tank, often inside the stand the tank is on, it requires two tubes to connect it to the tank. These are supplied with the filter. The blue valve will be the intake while the black is the output. You will want to place the tubes and get them completely settled before turning the filter on. The tubes are ribbed so you don’t have to worry about any kinks or weird water pressure.
Also consider where you place the filter. Try not to make it impossible to remove, as you will need to take off the top to get at the filter trays. Mine is under the main tank by the side of the sump with nothing above it. Having a clear space above it is key, as it has a collapsible handle which makes carrying it to the sink much easier than stationary maintenance.
The filter comes with a few different tube attachments, ranging from spray bard to normal L pipes. I use the L pipes submerged in the tank to remain as quiet as possible, but the spray bars do provide a ton of surface disturbance. This will help aerate the water if you lack an air pump (or just want to get rid of it).
Make sure you push the tubes all the way onto the filter before twisting the attaching nozzles. This will create an air tight seal on the tubes. With everything set up you can prime the filter. All you have to do here is push the plunger on the top of the filter a few times, with fast plunges being more effective. This will begin a siphon to the filter, filling it with water. Once the filter is full you can turn it on and you’re done. The filter may give your tank a blast of bubbles for a few seconds, but this subsides fairly quickly.
Cleaning
Canister filters take a bit more work to clean, but its still relatively quick. First you will need to shut off the intake. This is done by turning the valve to the side on the blue handle. This will stop the filter from bringing in any new water. The output tube will still be pumping water from the filter into the tank, allowing you to work with a dry filter and avoid a lot of dripping water some users experienced. Once the filter is done draining shut off the output the same way as the input.
Disconnect the tubes and decide where you will be cleaning the filter. The handle makes it really easy to take it to the sink, but I still leave it in place.
To open the filter you will need to undo the side clamps before lifting off the top of the filter. This will expose the filter media trays, which you can use just about any type of filter media you have on hand. I still use the poly pads. Still work great.
Each tray comes out separately with its own handle on the top. The top of the 1st tray will be held in place by a rubber gasket. Remove this but do not lose it, as it helps the filter work properly.
Once you have changed or rinsed off the filter media you will need to reassemble it in the reverse order. Remember to line up the holes with the impeller. Re-attach the tubes, tightening the nozzles and opening the valves before priming the filter again. Once that’s all done you can plug the filter back in and it should start back up with no issues.


