Internal filters are solid choices for aquarium owners who do not want to have excessive equipment hanging around their tank with hoses and cords all over the place. Instead, these filter create a clean aquatic environment while looking neat and clean.
Each filter here was tested in one of my aquariums for no less than one month. This allowed me to see any common issues first hand, clean the filters out and judge their filtration strength.
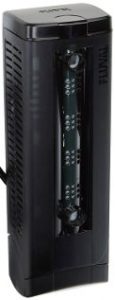
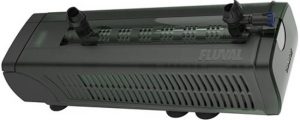
Fluval U Series Internal Aquarium Filter
| Cost: Medium | Filtration: Excellent
Size: 10-65 Gallon | Warranty: 3 Years |
The Fluval U Series internal aquarium filter was the filter I wound up keeping in my 40 gallon freshwater tank. It offered amazing filtration for an internal filter and was relatively quiet. The cost is not as cheap as other filter designed for its size, however the Fluval U Series is in a class on its own when it comes to internal filters.
This review is two part, as there are differences between the U1 and other models. The smaller U1 is a bit more noisy and troublesome to clean. For an internal filter that small I would stick with the Tetra whisper or Aqueon Quiet flow.
Design & Setup
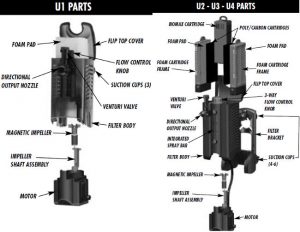
The Fluval U series is designed with simple operation in mind. It has powerful suction cups to keep the filter’s mounting bracket in place. The filter itself can be disassembled without removing it from the mounting bracket, allowing for quick cleaning and maintenance, which will be covered later.
Note: When handling the U1 I had difficulty opening the flip top to remove the foam pad. If you choose this model it will be a bit more difficult to clean.
Assembly U1
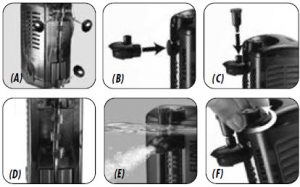
- Decide where the filter will be placed, leaving enough space for the filter to be opened.
- Rinse out the foam before putting it into the filter.
- Attach the suction cups as shown in (A) and the input nozzle with the venturi vent shown in (B).
- If you will be using the venturi system, attach the venturi valve on the vent, which must remain above water if it is to be used.
- The venturi system can be controlled by turning the valve to control airflow, as shown in (E) & (F)
- The cord should be placed into the slots as shown in (D)
- Plug in the power cord.
Assembly U2, U3, U4
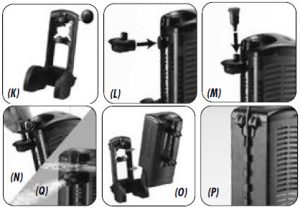
- Decide where the filter will be placed, leaving enough space for the filter to be opened from both the front and sides.
- Rinse out the foam and biomax cartridge before putting it into the filter. Be sure to remove the biomax nodes from the filter and replace into the cartridge before rinsing.
- Attach the suction cups to the filter bracket, shown in (K). The U2 & U3 have 4 top slots while the U4 has 4 top slots and 2 lower slots.
- Insert the output nozzle with the venturi vent facing upwards as shown in (L)
- If you will be using the venturi system, attach the venturi valve on the vent (M), which must remain above water if it is to be used.
- The venturi system can be controlled by turning the valve to control airflow, as shown in (N) & (Q).
- Slide the filter onto the bracket and lock it in place by squeezing the filter case and bracket together (O).
- The cord should be placed into the slots as shown in (P)
- Plug in the power cord.
The flow may be controlled using the flow control knob shown in the models disassembled picture above. The U1 only controls flowspeed while the other models control speed and where the output is. The three settings are the top output, the middle spray bar like output and the bottom outlet.
Cleaning
The U2, U3, and U4 are extremely easy to clean. Be sure to clean out the parts at different times, as cleaning it out entirely will reduce the beneficial bacteria in the tank dramatically.
U1
Unplug the power cord and open the filter cover. This may be a bit difficult but try not to knock the filter down, as this will expel a lot of the collected debris. Remove the foam filter and either rinse it out with tank water or replace it with new filter foam. You can also take this time to scrub clean the filters intake and grates.
U2, U3 & U4
For these models start by unplugging the filter and opening the filter cover. This is easier if you partially remove the filter from the mount and lean it forward in the aquarium. Slide the foam cartridge out of the body, keeping them vertical to avoid releasing the captured debris. You may also remove the poly/carbon cartridge from the frame. Remove the foam from the frame and either rinse or replace it.
Replace the poly/carbon cartridge by inserting the carbon side facing outwards. Snap the top side of the cartridge shut under the two tabs on the top of the frame. Do the same with the biomax cartridge, rinsing off the nodes or replacing half of them. reinsert the frames into the filter, making sure to properly align the hole at the bottom of the biomax cartridge with the top of the impeller opening. Close the filter cover and push the body back into place.
For the impeller and motor you will need to keep the power unplugged and remove the entire filter from the aquarium. Slip the electric wire out of its slot and release the motor from the filter body by squeezing the two release arms on the side of the motor housing.
Remove the impeller by gently pulling the fan of the impeller to remove it. Clean the impeller and magnetic mount with a soft, non abrasive material, such as cotton swabs. Once done push the impeller back into place. Reassemble the filter and return it to the tank.
Lifetime & warranty
Fluval offers a great three year warranty on their filters, so long as you maintain proof of purchase. There is also a warranty card in the included instruction manual which you can fill out and send in to register your product with Fluval.
When well maintained the filter should easily out last the warranty, with the earliest signs of trouble showing up at four years. The most common issue with internal filters is when large debris gets trapped in the impeller.
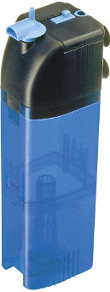
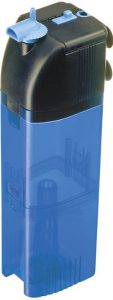
Penn Plax Cascade Internal Filter
| Cost: Medium | Filtration: High
Size: 20-50 Gallons | Warranty: 3 Years |
Penn Plax is a name I often turn to when I need something of good quality without a high cost. Their internal filter is no exception. The Cascade is fairly quiet when placed underwater, easy to clean and offers a larger body, allowing for they use out custom inserts. This makes upkeep much cheaper, as the replacement components for most filter often cost much more than they are worth.
Assembly
The Cascade consists of four main parts with two chambers for filter media. There are also three included tubes and six suction cups. The filter can be placed completely submerged or partially above water. There is a minimum water level on the filter, so make sure this stays under the surface.
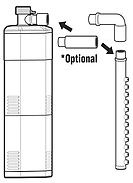
The top compartment houses the motor and impeller. The second chamber holds the chemical media while they final, bottom chamber holds the filter media. The tubes shown can be used to change the output into a spray bar set up, which helps spread the waterflow. This will increase resistance on the pump, making it a bit louder. If your filter is going to be completely submerged I suggest foregoing any attachments, which will make the filter a bit quieter.
Cleaning & Maintenance
The filter comes apart with a bit of force, separating into the three main pieces. In the motor housing there will be an impeller lock, which should be removed to service the impeller. This will consist of wiping the impeller and its housing clean before reassembling it.
For the other two sections you can simply rinse out the body and either replace or rinse off the filter media. Because the body is so large you may use whatever filter media you like, as well as custom chemical filtration.
Lifetime & Warranty
Penn Plax offers a three year warranty on their internal filter, which is also showing inside the manual with a registration card. Simply holding proof of purchase has been enough in my experience, but you may want to fill out the card anyways.
The great thing about Penn Plax is that they will sell any replacement part you need individually. This means any and all damaged parts can be replaced for a fraction of the cost of replacing the filter itself. If well kept this internal filter tends to last anywhere from three to ten years. The parts don’t really run themselves out too much, but they can be damaged by the aquarium environment. Expect it to be closer to three if used in a saltwater tank.
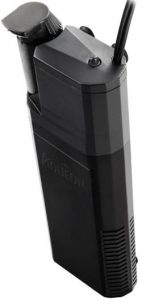
Aqueon Quiet Flow Internal Filter
| Cost: Low | Filtration: Medium
Size: 5-40 Gallons | Warranty: Lifetime |
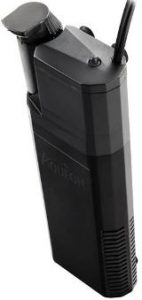
The Aqueon Quietflow is a common internal filter that most aquarists will see at one point or another. They are extremely cheap, provide decent filtration without taking much space or running loudly. Both the output direction and flowrate can be controlled and the suction cups are solid. Overall this is a great, low cost internal aquarium filter.
Set Up
The Aqueon comes assembled, making it as simply as sticking the filter to the wall of the aquarium and turning it on. You will want to rinse out the filter media before using it to remove any dust it has collected.
The filter’s output and direction can both be controlled. To change the output simply move the slider underneath the output. The output can be adjusted two different way: the direction the output is aimed and the way the output is positioned on the filter.
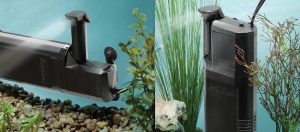
The filter does best when located near the bottom of the tank for a few reasons.
- The deeper the filter is, the quieter it will sound.
- Most debris will head towards the bottom of the tank.
- The output will help circulate the water near the bottom of the tank, which helps keep the substrate clean.
- The filter will typically be harder to see the deeper it is.
Mine sits just above the substrate, allowing young plecos enough space to swim underneath it.
Cleaning & Maintenance
Changing the filter media is only a few steps. First remove the filter from the water and carry it to the sink, holding something underneath to catch the water it drips. Open the filter by pulling it apart near the top of the filter.

There will be a divider holding both the filter media and impeller in place. The filter media will be in the bottom compartment in a case. To clean this you can do one of three things: Replace the case and media, rinse out the media or replace the media with your own filter media. I’d suggest these poly pads found on Amazon. They’re extremely cheap and absolutely huge.
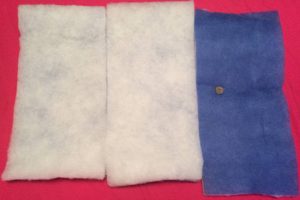
That’s a quarter too, not a penny
Overall this is a great, low cost yet silent filter that every aquarist should try at least once. The lifetime warranty ensures that this filter will last, even if you get out of the hobby for awhile.
Tetra Whisper
| Cost: Low | Filtration: Medium
Size: 10-40 Gallons | Warranty: Two Years |
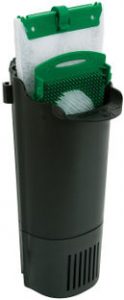
The Tetra Whisper is a simple, bare bones kind of internal filter. The impeller pulls water through the bottom of the filter and through the media until it exits out the top of the filter. All of the components lay exposed at the top side of the filter, making it extremely easy to clean. While it is named the whisper, it is not silent and can be heard in a quiet room.
Assembly & Maintenance
The Tetra Whisper is designed to hang on the rim of the aquarium, with the water covering the bottom grate. When the tank is full of water the filter will be mostly submerged in the tank.
The Tetra Whisper comes with a suction cup that attaches near the bottom of the filter to help hold the filter in place. This is needed to make the filter stop rattling & making excess noise.
The bottom portion of the filter comes off with a bit of force. This portion houses the motor and impeller. The top portion of the filter holds the two filter baskets. This makes the Whisper a good option for those looking to make their own filter bags.
To maintain the filter you will need to unplug the filter, remove the filter media and detach the bottom portion of the filter. Inside the bottom portion is the motor with an impeller and magnetic mount. These will be the main parts you should clean to extend the life of the filter.
The filter media can be rinsed or replaced at your own discretion. Tanks with smaller bioloads and less messy fish will not need the media changed as often.
Lifetime & Warranty
Tetra offers a two year warranty on their whisper filter. This warranty does require a small fee to be paid for servicing the filter, but it is still much cheaper than purchasing a new filter.
When cared for the filter has an easy time lasting over two years, more so when there is little to no debris found in the impeller. Filter which often have debris removed from the motor can expect to have a shorter lifetime.
